Installation Tutorial for Mac
QuantRocket runs on Docker, so installing QuantRocket is a two-part process:
- install Docker
- install QuantRocket
Install Docker Desktop
Visit Docker's website and follow the instructions to download and install Docker Desktop on your computer.
After the installation, start Docker Desktop if it isn't already started.
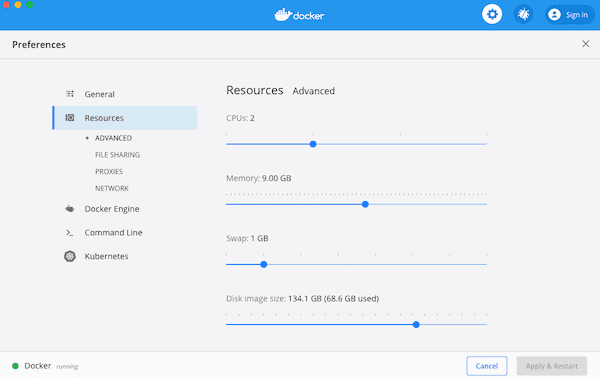
Adjust Docker's memory setting
By default, Docker Desktop uses 2 GB of your system memory. Giving Docker at least 4 GB of memory is recommended for QuantRocket. Generally, reserve at least 4 GB for your operating system or your computer might be sluggish. This means your computer should have a minimum of 8 GB of memory. If you plan to collect minute data, 8-12 GB is recommended for Docker (12-16 GB total). The more memory you give Docker, the larger the backtests and data analysis you can do.
To adjust Docker's memory setting, click  ->
-> Preferences in the menu bar, then click Resources -> Advanced and adjust the Memory slider to the desired position.
Install QuantRocket
To install QuantRocket, download a Docker Compose file which tells Docker how to create the QuantRocket stack. A Compose file is a YAML file that defines a multi-container Docker application.
On your Mac, open a Terminal (Applications > Utilities > Terminal).
Create a folder for QuantRocket under your home directory:
$ cd ~
$ mkdir quantrocket
$ cd quantrocket
Copy and paste the following command to download the latest Compose file and save to your computer:
$ curl 'https://www.quantrocket.com/composefiles/latest/local/docker-compose.yml' -o docker-compose.yml(You can also download the Compose file from the downloads page.)
Newer versions of Docker Desktop ship with Docker Compose V2, but QuantRocket utilizes Docker Compose V1, so you should disable V2:
$ docker-compose disable-v2Now, use docker-compose to deploy QuantRocket:
$ cd ~/quantrocket
$ docker-compose -p quantrocket up -d
Docker Compose will read your docker-compose.yml, pull the images down from Docker Hub, and create and run containers from the images. This process takes 5-15 minutes. You will see output like this:
Creating network "quantrocket_default" with the default driver
Creating volume "quantrocket_codeload" with default driver
Creating volume "quantrocket_db" with default driver
Creating volume "quantrocket_flightlog" with default driver
Creating volume "quantrocket_settings" with default driver
Pulling codeload (quantrocket/codeload:2.5.0)...
2.5.0: Pulling from quantrocket/codeload
852e50cd189d: Pull complete
a6236801494d: Downloading [======================================>            ]  62.63MB/80.38MB
679c171d6942: Download complete
8fe74afaa3e3: Download complete
d9ada034b8a6: Downloading [=============>                                     ]   4.94MB/18.95MB
You can list all the containers that are running:
$ docker psCONTAINER ID IMAGE COMMAND CREATED STATUS PORTS NAMES
d26da467ac03 bc77b14f9c3d "uwsgi-quantrocket -…" About an hour ago Up About an hour 80/tcp quantrocket_master_1
b1569b403b38 f2226cb5f6c3 "uwsgi-quantrocket -…" About an hour ago Up About an hour 80/tcp quantrocket_fundamental_1
fcf1c7b0fb36 1ca2dbd9bfd2 "uwsgi-quantrocket -…" About an hour ago Up About an hour 80/tcp quantrocket_realtime_1
952089561d20 fcade8902208 "uwsgi-quantrocket -…" About an hour ago Up About an hour 80/tcp quantrocket_history_1
...You can now access the Jupyter environment in your browser at:
You may want to bookmark this URL.
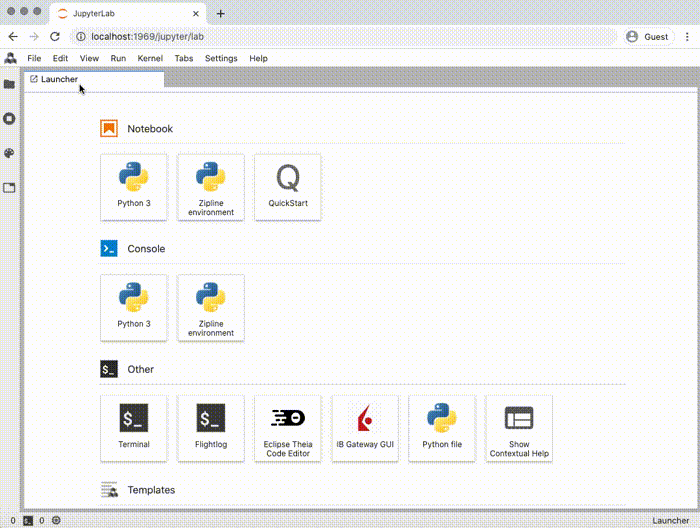
In JupyterLab you'll see the JupyterLab dashboard. Click the Quickstart button to find an interactive tour and other resources to help you get started with QuantRocket: